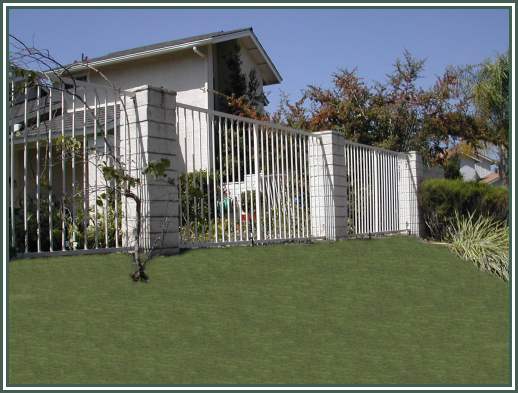
Wrought Iron Fencing Installation: A Step-by-Step Guide
Adding a wrought iron fence to your property is a significant investment in both security and aesthetics. The elegance and durability of wrought iron make it a popular choice for homeowners and businesses alike. However, before you enjoy the benefits of your new fence, it’s essential to understand the installation process and what to expect along the way. In this blog post, we’ll guide you through the key aspects of wrought iron fencing installation, ensuring a smooth and successful project.
1. Initial Consultation:
The installation process typically begins with an initial consultation with a professional fencing contractor. During this meeting, you’ll discuss your fencing needs, preferences, and budget. The contractor will assess your property and provide recommendations based on your requirements.
2. Design and Customization:
Once you’ve decided to proceed, you’ll work with the contractor to finalize the design and customization of your wrought iron fence. This includes selecting the fence style, height, decorative elements, and any additional features like gates or finials. Customization allows you to create a fence that complements your property’s architecture and landscaping.
3. Permits and Regulations:
Before installation can begin, it’s essential to obtain any necessary permits and ensure compliance with local building codes and regulations. Your fencing contractor should guide you through this process and handle the paperwork on your behalf.
4. Preparing the Site:
The next step involves preparing the installation site. This may include clearing vegetation, leveling the ground, and ensuring proper drainage. The site’s condition is crucial for a stable and long-lasting fence.
5. Marking and Layout:
The contractor will mark the fence’s layout on the ground, ensuring accurate placement and alignment. This step helps visualize the final result and ensures that the fence will follow the property’s boundaries.
6. Installing Posts:
Wrought iron fences are typically anchored with sturdy posts. The contractor will dig holes for the posts, set them in concrete footings, and ensure they are level and plumb. The posts provide the foundation for the entire fence.
7. Assembling Fence Sections:
The individual sections of the wrought iron fence are assembled on-site. Each section is carefully measured and cut to fit the specific area. The decorative elements and panels are attached to the posts, creating a cohesive and elegant design.
8. Welding and Finishing:
Welding is a crucial part of wrought iron fence installation. The sections and components are welded together to ensure structural integrity. After welding, the fence is inspected for any imperfections, and necessary touch-ups or finishing touches are applied.
9. Painting and Coating:
To protect the wrought iron from rust and the elements, it is typically painted or coated with a rust-resistant finish. This step enhances the fence’s longevity and appearance, allowing it to withstand years of exposure to the elements.
10. Final Inspection and Cleanup:
Before completing the installation, the contractor will conduct a final inspection to ensure that the fence meets quality standards and specifications. Once approved, any debris and construction materials will be removed from the site, leaving you with a clean and beautiful wrought iron fence.
Understanding the wrought iron fencing installation process helps you set realistic expectations and ensures a successful project. With proper planning and the expertise of a professional fencing contractor, you can enjoy the security, elegance, and enduring beauty of your new wrought iron fence for years to come.
Choose The Right Wrought Iron Fencing Contractor For You
1. Define Your Project Needs:
Before you begin your search for a contractor, it’s important to clearly define your project’s scope, budget, and timeline. Determine the specific details of what you want to accomplish so that you can communicate your requirements effectively to potential contractors.
2. Seek Recommendations:
Start by asking friends, family, neighbors, and colleagues for recommendations. Word-of-mouth referrals can be valuable because they come from people you trust who have had firsthand experience with a contractor.
3. Research Online:
Utilize online resources to expand your list of potential contractors. Websites, social media platforms, and online review sites like Yelp, Angie’s List, and Houzz can provide insights into contractors’ qualifications and reputations.
4. Check for Licensing and Insurance:
Verify that any contractor you consider is properly licensed and insured. Licensing requirements vary by location and type of project, so check with your local licensing authority. Adequate insurance is crucial to protect both you and the contractor in case of accidents or property damage during the project.
5. Review Portfolios:
Examine the portfolios of potential contractors to assess the quality and style of their work. Look for projects similar in scope and design to your own. This will give you a sense of their expertise and whether their style aligns with your vision.
How The Fencing Pro Can Help Transform Your Property
Our Orange County Fencing Contractors at The Fencing Pro are your trusted partners for transforming your property. With expertise in a wide range of fencing options, a commitment to quality, and a customer-centric approach, we are dedicated to enhancing the beauty, security, and functionality of your home or business. Whether you’re seeking the timeless elegance of wrought iron or the contemporary appeal of aluminum, our team is ready to guide you through every step, from material selection and customization to installation and maintenance. So, If you’re looking for a wrought iron and aluminum fences contractors in Stanton, CA, contact The Fencing Pro and experience the difference that expertise, professionalism, and exceptional service can make in elevating your property to new heights.

